Beginning Again

Leave a comment

It’s been over three years since I touched Ruby, the Red Fiddle, in any meaningful way. It’s been well over a year since I rosined up my bow and drew it across the strings of my favorite German fiddle, named, for now, Brandon’s Fiddle, after the man I acquired her from.

A comment here the other day reminded me I have this blog, a place I love to hang out, if only in my mind.

The other week I was putting in my shift at the local Art Guild Shop with Steve, a woodworker of great skill, and we were talking about wood in relation to his projects when I mentioned that I was looking for a piece of quarter-sawn figured maple of a fairly specific size.

He grew thoughtful, rolling his eyes towards the ceiling, mentally picking through his Wood Stash. “I might have a piece that would work for you…” he said. “I’ll look in my shop and give you a call.”

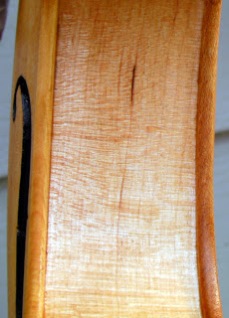
A couple of days later he invited me over to see if a likely piece would suit my purposes. He pulled out a slab of lovely flamed maple, about three feet long, and the perfect width to book match. It was sawn exactly on the quarter, with rings about 1/8″ apart.

He ran his hands over it as he told me the story of how he acquired it and how he’d been waiting to find the Perfect Project for it. For twenty years! I started to feel bad about wanting it, but he finally sighed, trimmed off the end and cut me a 16″ length, even going to far as to plane the edge and cut it in half so I could glue it up with (hopefully) no further work.

We stood in his shop, chatting about wood and he pulled out some veneer slabs, telling me about each species and how they should be finished, and out came a lovely piece of flamed maple, 1+mm thick, four feet long and four inches wide. I could not hide my gasp – this piece would be perfect for ribs! He was confused at my delight, but agreed to let that piece go, too, all for the fine price of “fair market value.” Any way you slice it, I got a hell of a bargain! I hope 🙂

Today I found myself online purchasing a couple pieces of spring steel to make new scrapers and cruising through the violin making forums, finding old “friends” still building and restoring and I’m itching to get home and pull some things out of their storage places, just to see if they’re still waiting for me to get back in the spirit of building again.

Since my last building posts my entire life has changed in ways I would never have dreamed possible and I have a very different living situation which will pose some interesting building problems which I’ll document here for those who find themselves in similar situations, and because I love to solve problems.

Oh, I also bought another banjo, so expect to see some banjo related posts here as I get both of them up and running.

Thank you for staying tuned!
A little banjo funny

Leave a comment

Here’s a cute and very talented parody of a song you may remember from your youth –

Second Coat of Varnish

1 Comment

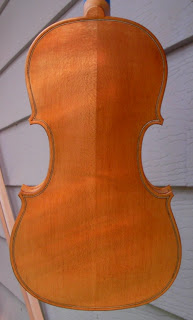
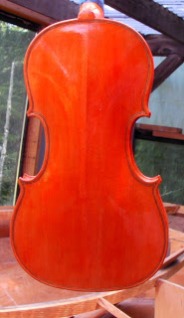
Varnishing is proceeding on schedule with the second coat on and dry. The proof –

Nice shape, eh? I am really happy with the back, even though it has no flames. The grain is really popping!

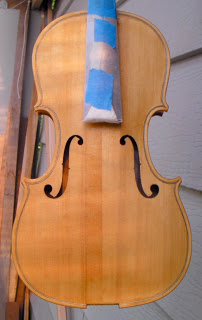
The front –

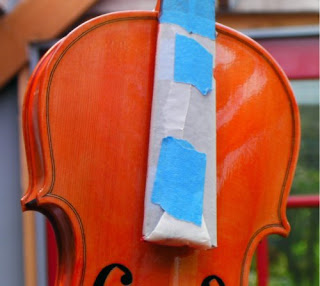
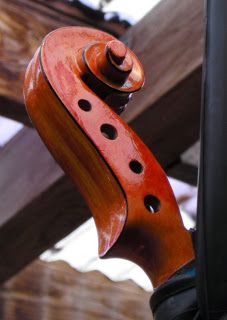
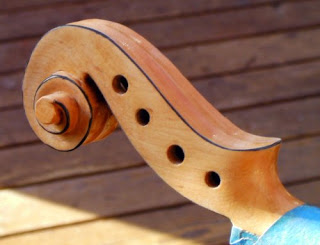
Because it’s now so shiny, it’s hard to get good pictures of the whole fiddle. The scroll –

The finish isn’t really as textured as this picture seems to suggest, but it’s not smooth like a sprayed finish either. A few more coats will even out the color (fingers crossed) and it will all come together and as the varnish shrinks over the years, it should look better and better.

I arsed up the third coat of varnish on the belly and had to rub it off. I knew going in that it wasn’t a good day to varnish – I just wasn’t feeling it – but pushed on anyway and paid for it with an added delay. Nothing is un-fixable, but it is frustrating. Sometimes the hardest part of making/-building anything (for me) is knowing when to walk away.

First Coat of Varnish

Leave a comment

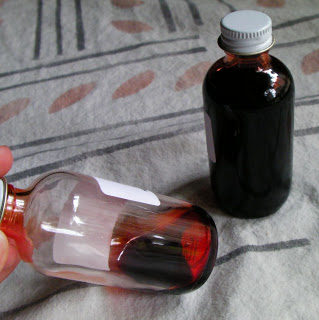
Weather and work schedule have finally favorably aligned and the Red Fiddle is getting some color. The varnish is color 1010R from International Violin. The bottles when full look brown, which seems logical, to protect the color, right? Nope. Turns out the bottles are clear and the varnish is the color of cough syrup –

There was a major OMG moment as the brush moved over the ribs and left behind a horrible, sick, bright and awful pink. My heart just sank, I can tell you. Never has a color been so very, very wrong for violin varnish. Holding my breath and telling myself that the folks at International Violin know what they are doing and that if I just stay the course all will be well, I hung her up on the sunny porch and walked away. It was just all wrong and I was not hopeful.

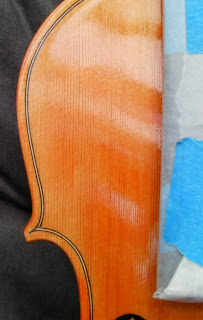
After a couple of hours alone on the porch, something miraculous had happened. Behold the first coat of varnish on the back –

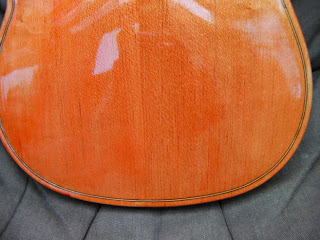
Not pink! Not bad, but not really red, either. The color isn’t quite right on my monitor, a bit more orange than IRL, but it’s very nice. The front –

The spruce top is not taking the color as evenly as the back, but it’s an interesting look. No idea what’s going on, but it’s only the first coat. Still, look at the texture! I am really happy overall with how things are progressing and anticipate it getting even better.

Outlining the Scroll

1 Comment

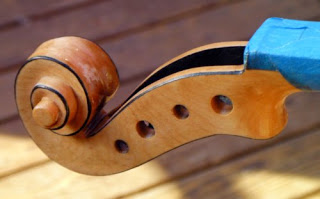
Here is the scroll of the Red Fiddle, the edges outlined with black paint –

The paint was applied with a very small brush and I found that using it sideways along the chamfer of the scroll was the easiest method for getting a clean line.

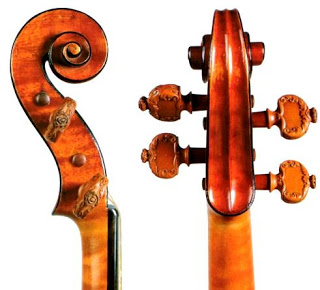
The inspiration is the scroll of Stradivari’s masterpiece, the Messiah.

Now to get some red varnish on this fiddle!

Shellac at Last!

Leave a comment

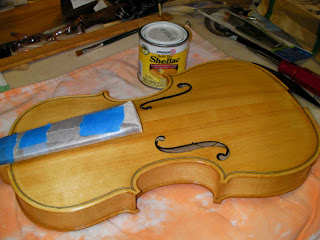
The color is developing nicely on the Red Fiddle, a soft, honey blond with accents on the darker grain lines. The picture shows the results of three coats of shellac applied over the sugar seal.

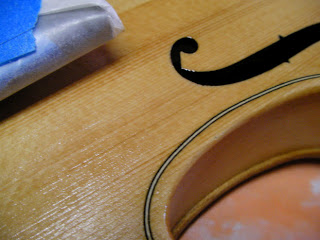
The belly texture is everything that I hoped it would be, grain lines slightly raised in what is called a”corduroy” finish, very unlike the sprayed factory finish seen on the usual mass-produced fiddles you can find everywhere for $100 or less. I couldn’t be happier!

This project has been having problems with contamination on the finish – hair, dust, grit, small bugs – everything you don’t want to see on the finished fiddle, and progress has been slow, which is irritating in itself. The weather has not been helpful, either, with plenty of rain and temperatures hovering just under 50*F – not ideal for curing varnish. The color will be applied soon, weather be damned! I hope I don’t live to regret those words…

The Ground – Second Coat

2 Comments

The first ground coat did not dry properly, and I blame the honey in the ground mixture. Should have re-read the “directions” all the way through and I would have re-discovered that the sugars used must be hard at room temperature – liquid honey will never dry. Live and learn. A gentle rub with a damp, lint-free towel removed the sticky and we were good to go.

A new batch of sugar seal was mixed up and brought to a rolling boil – 1/2 cup tap water, 1/3 cup brown sugar, two tea bags and a tsp of powdered red tea, just to see what would happen. The mixture was strained through a cloth and applied (after a cooling period) with a foam brush.

The results? Pretty good, IMHO –

The second ground coat dried very fast, within half an hour or so, much as I remembered the Six Foot Fiddle ground coats.

Both of the photos above are a bit darker than Real Life, but the shade is pretty close. Here’s a close-up of the ribs that is much closer to reality –

My camera doesn’t quite capture the shine and contrast of the grain. Overall I am very happy with the finish so far. On to the shellac!

The Ground – First Coat

7 Comments

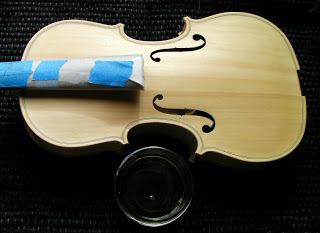
As with the Six Foot Fiddle, the Red Fiddle will have a sugar seal as the ground coat. Why? Well, it’s non-toxic, easy to apply and makes the wood grain “pop” in a most satisfactory way. Learning from the mistakes of last time, the ground formula for this fiddle is 1/2 cup tap water, 1/3 cup light brown sugar, 2 tsp honey and two black tea bags, simmered on the stove for an hour or so.Here she is in the white (note how dark the ground mixture is – you almost can’t even see it on the dark rug) –

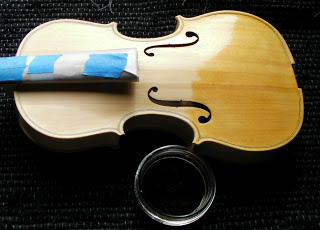
And here she is in process –

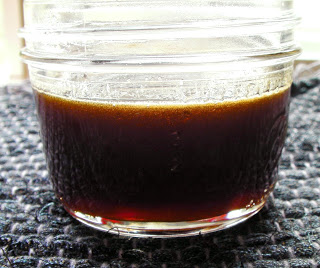
What a difference, eh? The black tea was added in the hope that it would darken the surface overall with a slight reddish tint. Pretty close! The sugar seal is brushed on while still warm with a foam brush. The mixture is quite thin and goes on very evenly with little effort. Here you can see how dark the mixture is –

Held up to the light it has a reddish tint, whereas the ground for the SFF was much more brown. Final results after one coat –

The picture makes the belly look streaky, but it’s really quite even with the dark grain lines popping –

I’ve elected to varnish with the fingerboard on (as some people believe the Masters did) simply because the fingerboard is very nicely fitted and is glued on very well – why make more work if you don’t have to, right? It’s easy enough to get a small brush under the FB, so it should work out just fine.

In the White

1 Comment

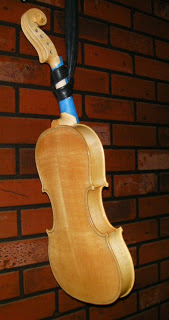
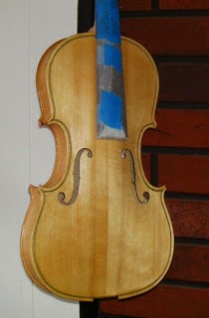
The Red Fiddle is almost ready for varnish. Here she is all “dressed up,” sans chin rest. The button needs to be shaped and final sanding and scraping attended to, but in the main, she is done. The bridge is still too high and thick, and the nut needs some adjustment, but these are minor details to be finished at the very end of construction.

Being the curious sort, I was eager to hear what she sounds like at this early stage and I was not disappointed. The sound is very BIG, as are the vibrations from the box. The longer she is played, the more she vibrates, especially on the lower strings, which I hope means that the soundpost is in the perfect spot.

The strings are Thomastik Prazision which have a solid steel core, and I quite like them on this fiddle. The pegs have no peg compound or drops, so they are slipping out of tune as I play and I wasn’t able to compensate fast enough, but it is what it is – a Good Enough sample for the purposes of this here blog.

I plan to make recordings at each stage of the finishing – in the white, after the ground coats are on, and after final varnishing just to see how the sound develops. You read about a fiddle in the white being very “open” and “brash” but it really doesn’t mean anything until you hear it for yourself, IMHO.

Soundpost Gauge

1 Comment

At this late date, the memory of putting the soundpost into the Six Foot Fiddle is a bit vague – I don’t remember it being painful, but it must have been (or I just got very lucky the first time) if setting the soundpost into the Red Fiddle is any indication!How the soundpost went into the SFF without a soundpost gauge is anyone’s guess, but I knew it would not work for the RF after about three hours spent putting it in and discovering the soundpost was too long, removing it, taking some length off, trying again, ad nauseam.

A gauge really is a necessary tool. Oh, sure, you can buy one anywhere on the ‘net, but then you have to wait for it to be shipped and waiting is not easy when all you really want to do is play the darned thing! What’s a builder to do? Make it from materials on hand, of course!

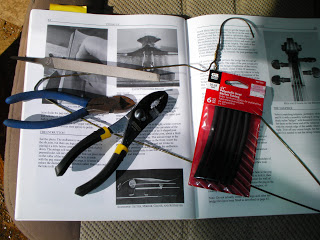
First, gather materials –

A picture for reference (here we see Strobel’s Violin Making) a metal coat hanger salvaged from the dark depths of a closet, heat shrink tubing (a drinking straw would work,) pliers, wire cutters and a flat file.

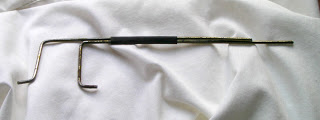
Using Common Sense and a bit of trial and error, the coat hanger is cut and bent. The ends of wire that will touch the inside of the fiddle are filed smooth and level. The heat shrink tubing is applied (not too tight!) and Bob’s yer uncle!

The finished tool ain’t elegant, but it is functional –

A coat of spray paint some day will make it look sharp and new, but for now it has been used and put away so that the important matters of fiddle building can take over once again – the playing!

Older Entries